|
Introduction Windows 95, 98, and NT include the software components for establishing a TCP/IP network. If you are using a PC with Windows 3.1, you will need a TCP/IP application package such as NetManage Chameleon. The instructions below provide the minimal basic setup that is most commonly used. Your network administrator might instruct you to enter either less or more information. Installing network hardware and software components First, inspect the current network setup of your computer. To view the setup, follow these steps:
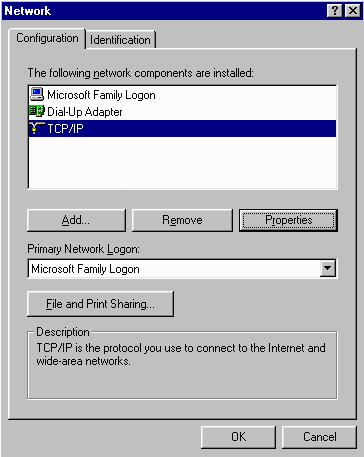
Network Properties The Network Properties menu will be displayed. For each tab, click on the reduced image to see a full-size example.
This first tab will display a list of installed components. Among the components, there must appear:
These components are the minimum necessary configuration for connecting a PC to the Oznet network. If any of these components are missing, add them according to the instructions below. You may be asked to insert your Windows CD during the installation of these components. If other components appear (such as IPX/SPX, NetBEUI, or Network adapters), do not delete them without determining whether they are needed for other purposes. If Dial-up Networking does not appear, follow these steps:
If the TCP/IP protocol does not appear, follow these steps:
If Client for Microsoft Networks (or Microsoft Family Log0n) does not appear, follow these steps:
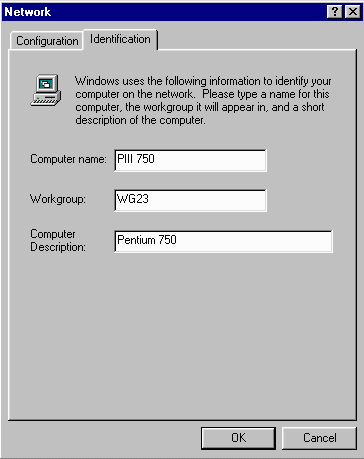
Select the Identification tab. Click on the reduced image to see a full-size example.
Configuring TCP/IP Properties At this point your PC is configured to use TCP/IP as its primary networking protocol, but it does not yet have an IP address or any other TCP/IP-specific properties necessary for TCP/IP networking. The remaining configuration information can be entered manually or it can be fetched automatically from a local server using the Dynamic Host Configuration Protocol (DHCP). Both methods are described below. Configuring TCP/IP Properties by
DHCP If your network includes a device (such as an NT server or a router) that is set up to function as a DHCP server, simply reboot the PC. The PC will obtain the following configuration information from the DHCP server:
Most routers are shipped preconfigured as DHCP servers and will assign an IP addresses, netmask and gateway address when an attached PC is rebooted. The default IP addresses will be from the range of IETF-designated private addresses. Configuring TCP/IP Properties
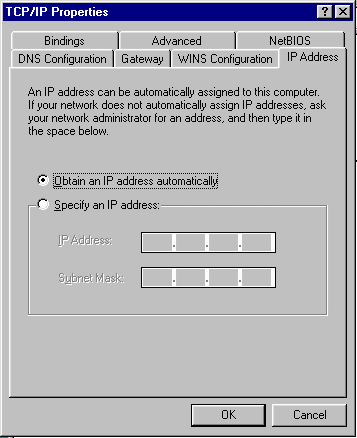
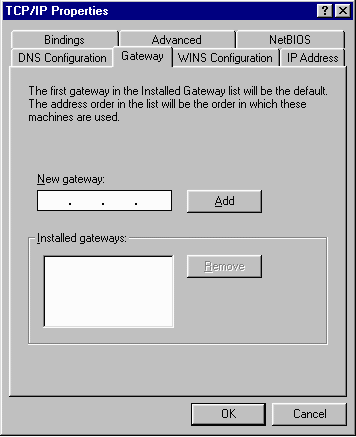
Manually If you choose not to configure your PC by DHCP, you must manually enter the TCP/IP configuration information. In the Network Properties menu shown in the previous section, select the Configuration tab. Select TCP/IP protocol, and click on Properties to display the TCP/IP Properties menu. This menu contains several tabs. For each tab, click on the reduced images on your right to see a full-size example.
Unless you have been assigned a registered IP address for your PC, tick the Automatic option.
If Oznet or your network administrator has provided you with the address of a DNS server, enter the address in this tab, otherwise
Other Tabs The TCP/IP Properties menu contains these additional tabs:
For basic TCP/IP networking, these tabs can usually be left at their default settings. For more information on Windows networking, please refer to your Windows documentation. Finish Manual Configuration
Verifying TCP/IP Properties
For Windows NT systems, use the application
'ipconfig'.
Click on 'More Info' to see additional configuration settings.
For generic Oznet Network settings Click
Here |
|
| SureDial Access
| Website Design | Website
Promotion | Domain Registration | Domain
Hosting | | Special Hosting Offer | Advertising on Oznet | Email Us | Comments & Suggestions | Terms of Service | Copyright© 2000 Oznet Internet Services SureDial™ is a Trade Mark of Oznet Internet Services All Rights Reserved. |

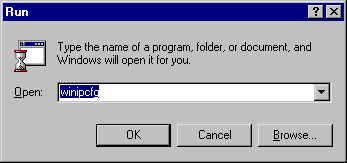 After your PC has been configured and rebooted, and after you connect
to Oznet, you can check the
TCP/IP configuration information by running the Windows application 'winipcfg'
from the Start button:
 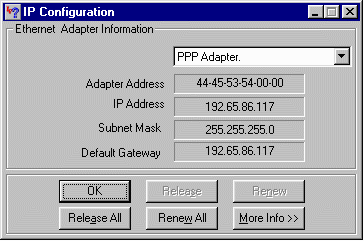 The
first winipcfg screen shows:
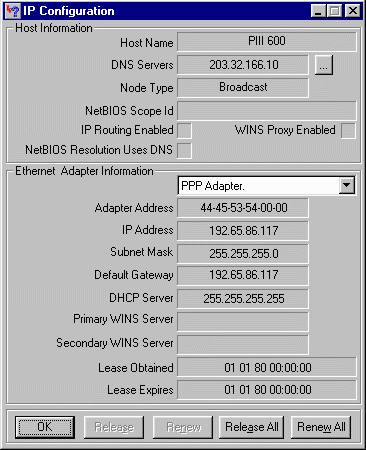 The
expanded winipcfg screen shows the addresses of the DHCP server and any DNS
servers.